
Modular wreath
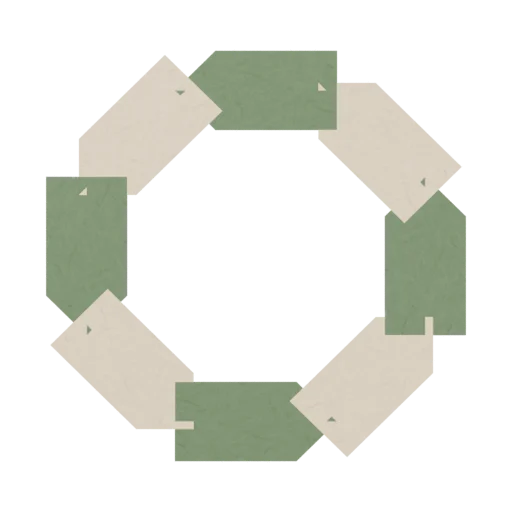
Fold eight matching arrow-shaped pocket units, then slide each point into the open end of its neighbor. A final pair of tucks closes a flat eight-piece wreath without glue or cutting. Use firm paper and handle the completed ring gently.
Before you begin
8 sheets · Square paper
15 × 15 cm
No scissors needed
Start foldingThis lesson is being checked for folding accuracy. It has not yet passed a physical fold-through review.
Step-by-step instructions
Read through the fold before you begin, or open any step in the folding viewer.
Printable guide (opens a new tab)
Gather eight equal squares
Use eight squares of exactly the same size. Thin, firm paper is easier to tuck than thick card. Start with the chosen outside face down; the squares keep their separate identities throughout this lesson.
Look for: Eight equal squares lie separately on the table.
See this fold
Shape the first upper corner
On the first square, fold the upper-right corner inward along the diagonal from the top midpoint to the right midpoint. Match the corner to the center.
Look for: One sloping edge leads toward the right midpoint.
See this fold
Complete the arrow point
Fold the lower-right corner inward along the matching diagonal from the bottom midpoint to the right midpoint. Both original right corners meet at the center.
Look for: The full square is now a broad arrow pointing right; no corners were cut away.
See this fold
Fold the top edge inward
Fold the top portion down along the horizontal line halfway between the top and center. Move every layer above the highlighted crease. Keep the right arrow point still.
Look for: The upper edge is folded into a flap; its straight hinge stops before the right tip.
See this fold
Fold the bottom edge inward
Bring the bottom portion up to the center line along the matching horizontal crease. The two folded flaps meet along the middle. Keep the square left end open between its layers.
Look for: The first unit is a narrow arrow with a pointed right end and an open square left pocket.
See this fold
Make seven matching units
Repeat the same four folds on each of the other seven squares: upper-right corner to center, lower-right corner to center, top edge inward, then bottom edge inward. Keep every point and pocket the same size.
Look for: All eight sheets are folded into matching arrow-shaped pocket units.
See this fold
Position the first unit
Set the first unit with its point facing toward the next position in the ring. Leave its square receiving end accessible for the final join.
Look for: One unit marks the beginning of the ring; the other seven remain separate.
See this fold
Join the second unit
Ease open the upper flap at the square end of the second unit. Turn it one eighth of a turn relative to the first, slide the first unit's point between its folded layers, and close the flap over the point.
Look for: The first point is held inside the second pocket, and the two units begin an eight-sided curve.
See this fold
Join the third unit
Open the square-end flap of the third unit. Turn it another one eighth turn, slide the second point into its pocket, then close and press the flap.
Look for: Three units form a continuous curved chain, with a visible tucked point at each join.
See this fold
Join the fourth unit
Fit the third point into the fourth unit's open square end. Keep the same turn and insertion depth as the previous joins, then flatten the pocket flap.
Look for: Four units make approximately half the wreath.
See this fold
Join the fifth unit
Open the fifth pocket, guide the fourth point inside, and close its flap. Keep all units flat and the points following the same direction around the ring.
Look for: Five units continue the curve without twisting the paper.
See this fold
Join the sixth unit
Slide the fifth point into the sixth pocket at the same angle and depth. Close the flap and press the connection gently.
Look for: Six units surround most of the central opening.
See this fold
Join the seventh unit
Open the seventh pocket and tuck the sixth point inside. Close its flap; leave room for the last unit rather than forcing the chain into place.
Look for: Seven units form an almost complete ring with two ends still free.
See this fold
Close the ring with the last unit
Open both the eighth unit's receiving flap and the first unit's receiving flap. Fit the seventh point into the eighth pocket while guiding the eighth point into the first pocket. Close both flaps and ease the joins to equal depths.
Look for: All eight points are tucked into neighboring pockets, including the final join back to the first unit.
See this fold
Settle the joins
Press each pocket gently, even out the central opening, and rest the wreath flat. The pocket tucks rely on paper friction; lift it carefully and do not hang heavy objects from it.
Look for: Eight distinct sheets form a closed, flat ring with no glue, cuts, or loose spare units.
See this fold